How to Field Dress a Deer with a Replaceable-Blade Knife
Last updated: June 2026Field dressing a deer is the act of removing the internal organs as quickly as possible after the kill so the meat starts cooling. Done right, it takes 10 to 20 minutes, requires one sharp blade, and one hunter, though a second set of hands speeds things up considerably.
Definition
Field dressing a deer is the process of removing the internal organs from a freshly killed whitetail or mule deer to begin cooling the meat and prevent bacterial spoilage. The standard tool is a 3 to 3.5 inch drop-point or gutting blade. Done correctly, it takes 10 to 20 minutes and requires one sharp blade, with the goal of dropping the carcass below 40°F internally before processing.
Why Minutes Matter
You shoot a deer. The clock starts the second it hits the ground.
Whitetails carry a body temperature around 101°F. The longer that gut cavity stays sealed up, the longer bacteria has to multiply through the meat, and the more likely you are to lose backstraps to bone-sour or gut-taint.
Field dressing buys you cooling time. You're opening the body cavity, pulling out the digestive tract, and creating airflow so the carcass can drop its core temperature. The goal is to get that deer below 40°F internally before processing. In 60-degree fall weather, you've got maybe two hours of margin from kill to gambrel before meat starts to suffer. In summer-warm temperatures (think early-season archery or a Texas hog hunt), it's measured in minutes.
This is why every hunter needs a sharp blade, fast. Not a passable edge. Sharp.
Field Dressing By the Numbers
Gear and Clothing Checklist
Pack this in your hunting bag and stop thinking about it:
- Sharp knife with a 3" to 3.5" blade (drop-point or gutting profile)
- A four-pack of replacement blades (more on this below)
- Nitrile or latex gloves, shoulder-length if you can get them. Saves you from scrubbing forearms.
- Game bags (cheesecloth or synthetic) for hauling out quarters
- Paracord for tying off the bung
- Headlamp. Half the deer killed every year drop in the last 30 minutes of legal light.
- Wet wipes or a bottle of water for cleanup
- Trash bag for offal if your state requires pack-out
I won't argue against a bone saw if you plan to split the pelvis or sternum. With a properly sized knife you don't need one for field dressing. Save the saw for the quarters.
Choosing the Right Blade for the Job
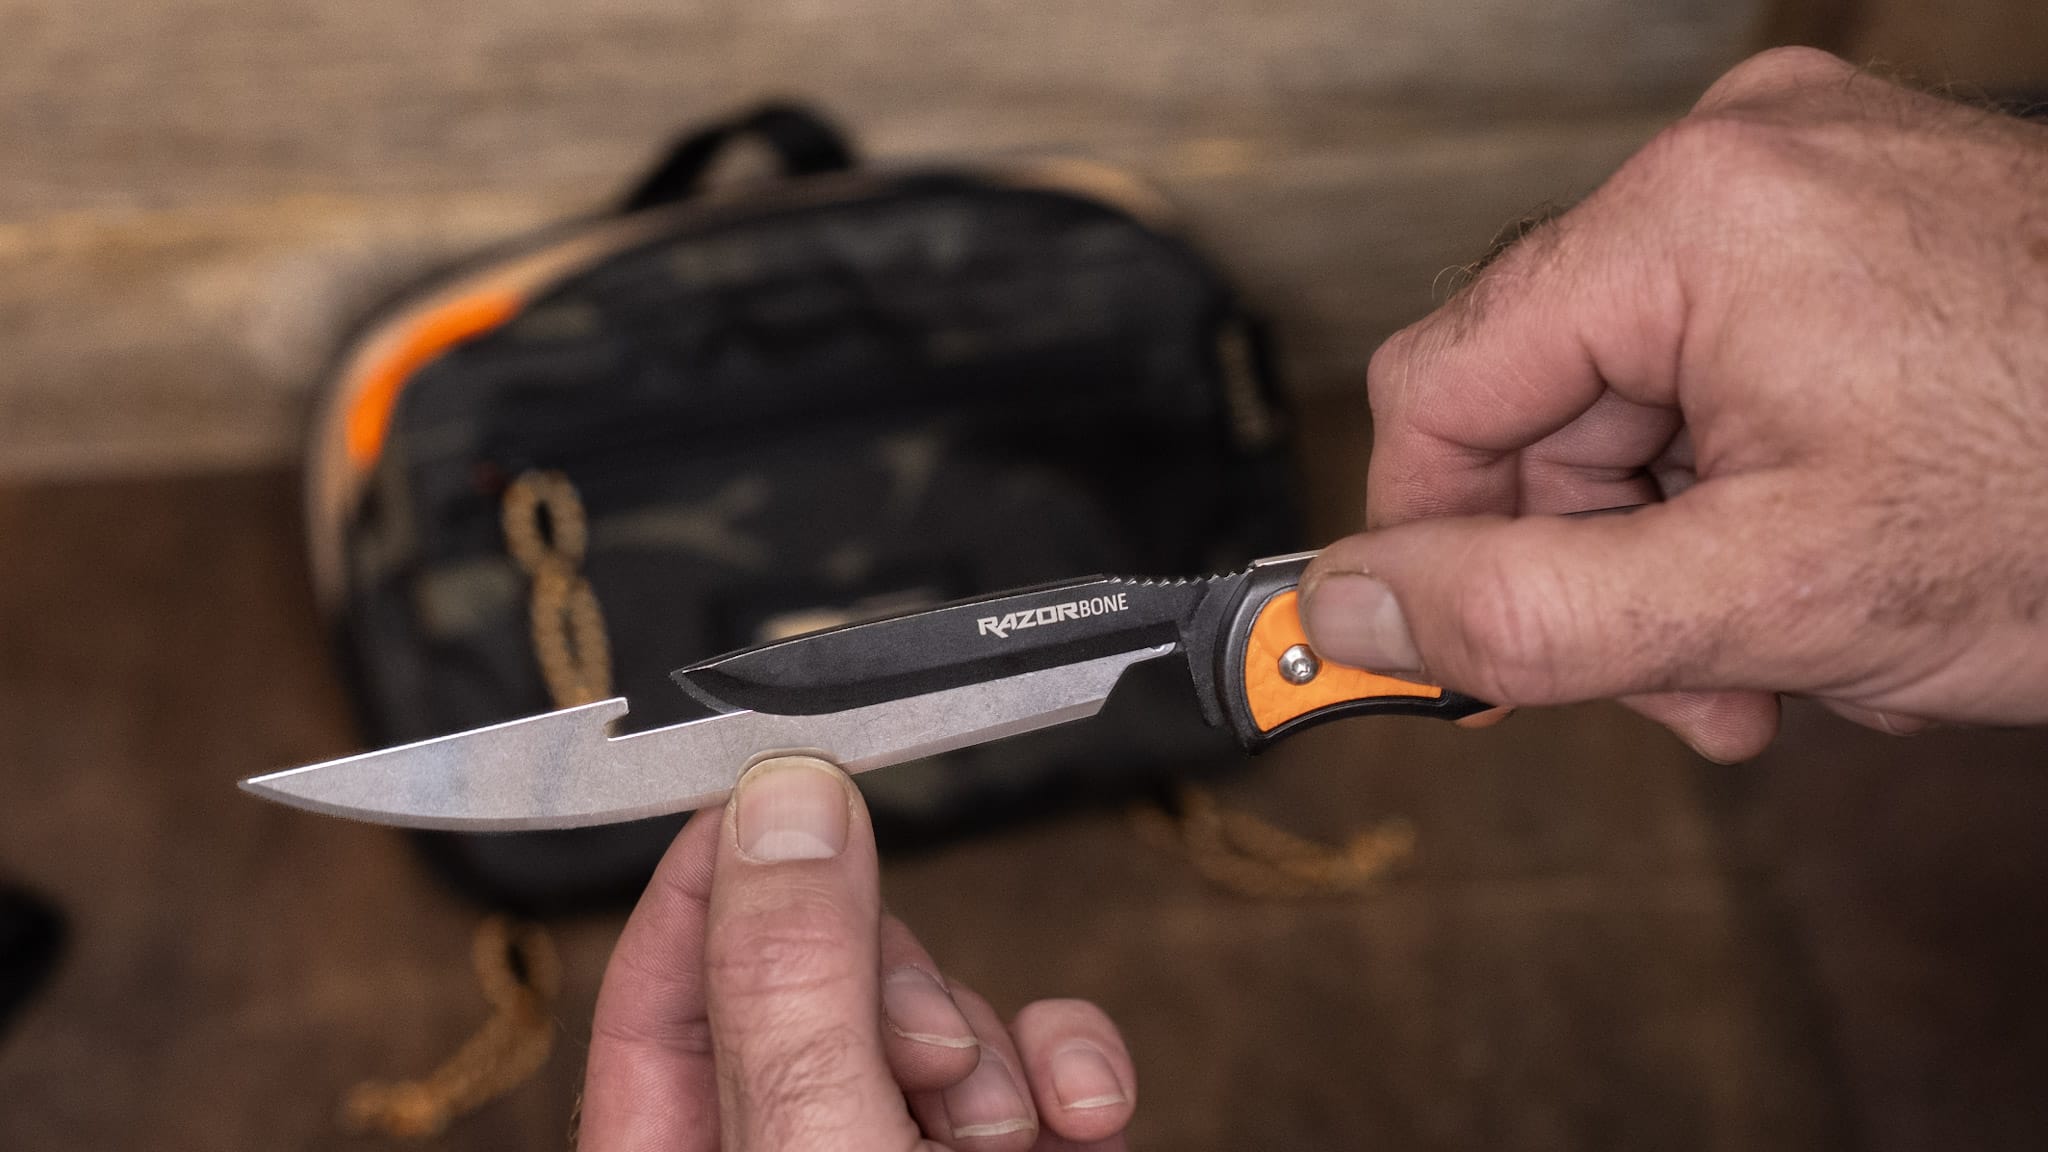
Not every blade does the same work. The Outdoor Edge RazorSafe System ships in nine blade profiles across five sizes (see all RazorSafe blade profiles). Three of them matter for field dressing.
| Blade profile | Size code | Best for | Why hunters pick it |
|---|---|---|---|
| Drop-point | 300 / 350 | General field work. Skinning, gutting, quartering. | If you carry one blade, this is it. Belly does the skinning, point does the precision work. |
| Gutting blade | 300 / 350 | Opening the abdomen without piercing the gut. | Blunt rounded tip rides along the inside of the body cavity. Best blade for hunters new to field dressing. |
For a backcountry pack-in where you're going to skin and quarter on the mountain, add a 3" caping blade (how to cape a deer) for the head and neck work, and a 5" boning blade (how to bone out a deer) for the muscle separation later.
How to Field Dress a Deer in 7 Steps
This is the standard ground-level method. Deer flat on its back, head uphill. If you're rolling solo and the deer is on a slope, you'll appreciate the elevation. Gravity pulls the guts toward the rib cage, which makes them easier to scoop out.
- Position the deer. Back on the ground, head uphill, legs spread. If you've got rope, tie one back leg off to a tree to hold the carcass open.
- Tie off the bung. Cut a circle around the anus with the tip of your knife (about an inch deep), pull the rectum free, and tie it off with paracord. This stops fecal matter from contaminating the cavity when you push the guts out the back end.
- Open the abdomen. Pinch a tent of skin and belly muscle just below the sternum, slip the blade in cutting-edge up, and run a cut from the sternum to the pelvis. Keep the blade tip riding along the inside of the cavity wall. This is where a gutting blade or your two fingers as a guide saves you. Do not, under any circumstances, cut into the stomach.
- Stop at the pelvis. If you plan to bone out at home or quarter in the field, you don't need to split the pelvis. Just cut down to the pubic bone. If you do split it, a small saw or a heavy fixed blade is the right tool. Not your replaceable blade.
- Cut the diaphragm. Reach into the chest cavity and cut the diaphragm flush against the rib cage. Free it on both sides.
- Reach in and pull. Reach as far up into the chest cavity as you can, find the windpipe and esophagus, cut them off, and pull everything down and out in one motion. The lungs, heart, liver, and gut should all come together. The tied-off bung pulls through last.
- Drain and prop open. Roll the deer onto its belly briefly to drain the blood pool from the cavity. Then prop the cavity open with a stick to let air circulate. If you're not hauling out for hours, splash some snow or creek water in there to start the cooling process.
That's it. The first time you do it solo, give yourself 30 minutes. By your tenth deer, you'll be at 12 to 15.
When to Swap Blades During the Process
A factory-sharp 420J2 blade (why we use 420J2 steel) will get you through one whole-deer field-dressing job without complaint. There are three moments where most hunters benefit from a swap:
- Before opening the abdomen. If you used the blade to dress out anything earlier in the day (a previous deer, a duck, even cutting tag wire), swap to a fresh blade before you cut into the body cavity. Cross-contamination is real.
- Mid-process if you hit hair or hide-side connective tissue. Dragging through hide chews up an edge fast. If you feel the blade start to stick instead of slice, swap. Five seconds of swap time saves five minutes of wrestling.
- Before any precision work. If you're caping for a mount, swap to a fresh caping blade (300-code caping blade pack). Don't make the cuts that matter most with the blade you just used to free the diaphragm.
Pack four blades for a deer hunt. You'll likely use one or two. The other two are insurance.
Pro tip: A fresh blade and a tied-off bung are the difference between dinner-quality backstraps and meat you're embarrassed to feed your family. Don't cheap out on either.
Common Mistakes (and How to Avoid Them)
- Cutting too deep on the abdominal opening. This is mistake #1. You nick the stomach, you spill rumen contents, your work just doubled. Use a gutting profile or a two-finger guide.
- Skipping the bung tie-off. Five seconds of paracord work saves a contamination disaster.
- Trying to gut a hot deer with a dull knife. A hunter with a dull knife is a hunter with bad meat. Replace the blade or sharpen before you start.
- Working uphill of the carcass. You'll get more on you than necessary. Stay below.
- Leaving the cavity sealed for the pack-out. An open carcass cools four to five times faster than a sealed one. Prop it.
- Forgetting cleanup before the truck. Wet wipes in the bag. Your truck seats will thank you.
After Field Dressing: What Comes Next
Once the deer is dressed, the work isn't done. The next decisions are about cooling, hanging, and processing.
If you're hunting close to a vehicle, get the deer to a hanging spot quickly. A gambrel and 8 feet of clearance is ideal. Head up or head down is hunter's preference. If you're backcountry, you're skinning and quartering on the mountain to drop weight. Either way, the next two skills you need are skinning a deer and boning out a deer.
For the strength question: yes, a replaceable-blade knife handles big-game field dressing. The blade holder transfers force the same way a full-tang fixed blade does (are replaceable-blade knives strong enough for big game?). You're not batoning firewood. You're slicing soft tissue. The system is built for the work.
Stock up before opening day: RazorSafe replacement blades come in four-packs and six-packs across all five size codes. Pack two fresh four-packs in your hunting bag and you're covered for any whitetail or mule deer hunt. Shop the full lineup of RazorSafe replacement blades and the RazorMax fixed blade or RazorPro L folder that fits your style.
Frequently Asked Questions
How long does it take to field dress a deer?
Ten to twenty minutes for an experienced hunter. Thirty minutes if it's your first time. The variables are terrain, light, whether you're solo, and whether you're keeping the cape for a mount.
Do I need to gut a deer before hanging it?
Yes. Gutting starts the cooling process and stops bacterial growth. Hanging an un-gutted deer is the fastest way to ruin meat.
What knife is best for field dressing a deer?
A 3" to 3.5" drop-point or gutting profile blade. The Outdoor Edge RazorSafe System gives you both profiles in the same handle, with five-second blade swaps if your edge gives out mid-process.
Can you field dress a deer without a gambrel?
Yes. A tree branch, a pickup tailgate, or even flat ground all work. Gravity helps if the deer is head-uphill, but the job gets done either way.
How many blade swaps does field dressing typically require?
For a single deer, most hunters use one blade. Pack four for a hunt. Two for the job, two for insurance.
What temperature does the deer need to cool to before processing?
Below 40°F internally before butchering. In warm weather, that means getting on ice fast.
Leave a comment
This site is protected by hCaptcha and the hCaptcha Privacy Policy and Terms of Service apply.