
A Culinary Comparison in Meat Cooking Methods
Let me preface this culinary comparison (aka: an experiment) with a statement. I am not a chef. I am a photographer who loves food, a curious dude who likes to explore different methods and practices in the kitchen. That being said this is more of a journal of what I am doing vs a step by step how to guide. I’ll let you know most of my settings, but overall we’ll be keeping the details a bit loose because we all have our own preferences. Ultimately my goal is to get you in the kitchen experimenting to find your own preferences and methods that work best with the equipment you have and your schedule.
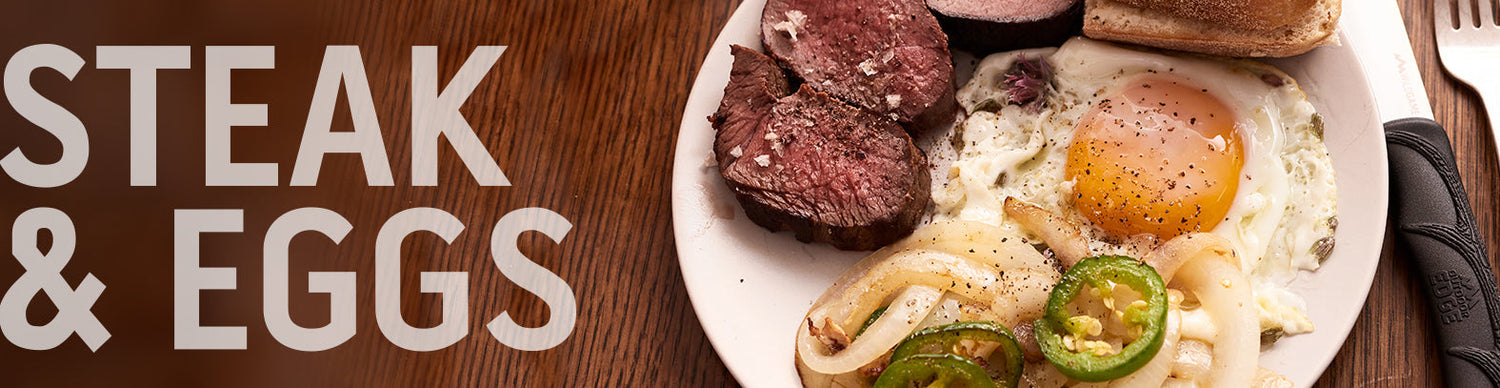
I feel like its safe to say that most of us love a good hearty breakfast or brinner in this case for me! Thats breakfast for dinner for those who aren’t in the know, it will change your life if you’ve never done it! We’ll just call it breakfast from here on out though. A standard breakfast in my house is steak and eggs. Being a generalist hunter in Indiana a lot of my steaks are venison (but this process would work equally well with anything red; duck, goose, elk, moose, you name it!). I’ve honestly gotten to prefer this lean meat to a fatty beef steak. Don’t get me wrong, I’m a huge fan of fatty cuts of meat, but sometimes it just feels like too much. Especially if you are eating your steak & eggs first thing in the morning. However I doubt much of the cooking methods would change much if any at all no matter what animal your steak comes from. Just keep your eye on it as you cook to make sure nothing is going awry! Thinking about the fat burning too quickly, or spattering too much in a skillet, etc.
This meat cooking experiment is going to be focused on 3 methods of cooking steak: sous vide, charcoal grill & pan fry. Which method is the best?? Being an experiment in different cooking methods, I did all 3 methods at the same time. I personally do not recommend this as I’m a stereotypical male and can only really think about one thing at a time. So to have 3 different steaks cooking 3 different ways and taking photos of the entire ordeal was a bit overwhelming. Regardless, I felt like it ended in success and I definitely have a favorite. Tag along to see how things went for me and comment your favorite method & cooking tips below

3 Hours Before Dinner - Sous Vide Prep
Consulting my friend Ryan, my local smoking & sous vide master, I was instructed that my 11 oz, 1.5 inch thick steak would take about 2 hours to fully cook in the sous vide bath. Four hours in the bath would be the extreme and it should not go that long (spoiler alert: he was right).
I got out my vacuum sealer, prepared my steak (see steak prep below), seasoned with pepper and sealed it up. I filled up a pot with water and set up the sous vide stick to run a few degrees below my desired finished steak temp. With sous vide you will want to ‘finish’ the steak on the grill or in a skillet. Doing the finishing will raise your steak temp a few degrees. I ran my sous vide bath at 125° with a target finish temp of 130°, medium rare. Once the steak was in the bath I set a timer and left it alone. This was a little nerve racking because you just have to have experience and trust the meat is at temp. You cannot stick a thermometer in the meat to check temps along the way. The steak needs to stay sealed up and protected from the water throughout the cook. This is why I like to use a vacuum sealed bag vs a resealable plastic bag. I’ve had bad experiences with the resealable bags leaking.
1.5 Hours Before Dinner - Steak Prep
I like to age my steak in the refrigerator for a couple days or a week before I eat it. Totally optional, but I’ve found this helps develop a much more complex flavor, and tenderizes the meat a bit. Research this before just doing it! You can definitely go wrong if you don’t do it right! I absolutely love the taste of aged meat and really would love to explore more into this process!! Aging does add a ‘skin’ to the steak that you will want to cut off. Because of this process I like to keep the silver-skin on my meat when I butcher and throw in the freezer. It adds an extra layer of protection to the steak and I end up losing less from the aging process. Grab your filet knife and trim off the silver-skin and if you aged the steak, the dark, dried up ‘tough looking' bits. If you are new to venison, a good rule of thumb is, ‘If it’s white, take it off’. We can discuss butchering & venison fat later on. Once the steak is trimmed up, set it on a cutting board to come up closer to room temp before you cook.

1 Hour Before Dinner - Charcoal Prep
Choosing your charcoal is just as personal and important as the rest of the meal. Play around with a few different brands to see what flavor you like. I’ve settled on Rockwood lump charcoal, awesome flavor and no additives like binders or accelerants that may alter the flavor of your meat (I just find the idea of binders & accelerants unnecessary; however, they can make the process easier if you don’t want to fool around). Throw the Rockwood in a chimney charcoal starter, light some kindling below it and let it burn. It’s ready when the top is glowing. This might take 15-20 minutes. I tend to let it go a bit longer that I might need to, just to ensure all the charcoal is lit well. Once it’s ready, go ahead and dump it into your kettle grill and prep to cook directly over it.

30 Minutes Before Dinner - Steak Cooking
Crunch time. To be honest this is where I got a bit overwhelmed; however, if I were doing only one method and not taking photos it would be super easy!
While my grill was getting up to temp I threw some avocado oil in a skillet, set the heat to medium high, let the oil come to temp, and threw my steak seasoned with fresh ground black pepper in the skillet. You could also use butter or olive oil, but avocado oil works a lot better at high heat and won’t burn as easily. I’ve burned butter in the past and olive oil gets super smoky, so just be mindful of these factors when you prep your skillet. Also keep in mind not all ovens are the same! (Another spoiler, this is kind of why I prefer charcoal.) Watch your skillet temp, you don’t want it so low it cooks all the way through before you get a nice caramelized finish, but you also don’t want it to cook too fast and end up black on the outside and raw on the inside. I might recommend starting around medium and if the middle gets to your preferred temp before the outside looks awesome, just crank up the heat to max at the very end and hover over it like a hawk until the outside looks great. I like to put a lid on the skillet while I’m cooking to help keep oil splatter under control and to help keep a more even overall temp.
With my skillet steak on the oven, I took my charcoal steak out, oiled & seasoned with black pepper and threw it on the kettle grill. My guide to knowing if the coals are hot enough are to hold my hand at the height of a beer or soda can and if I can only hold it there for a second or 2 I’m good to go. Throw your steak on and put the lid on.
Regardless of what method you are cooking, until you’ve gotten used to your equipment and how how your steak should feel based on your preferred level of doneness, keep an instant read thermometer handy. Check it often and don’t leave it alone too long. It will most likely cook faster than you think.
Five to ten minutes in, I’ve flipped both my skillet steak and my charcoal steak, its time to pull my sous vide steak from the water bath and finish it off. FYI, sous vide steaks look nasty when you first pull them from the bag.. They need to be dried off with a paper towel, oiled & seasoned then thrown on the grill or a skillet to finish. I chose the hottest spot on my kettle grill. It really only needs a couple minutes on each side. Just enough to caramelize, develop a nice color and some nice grill marks. Remember its already cooked to perfection, we are just adding the last bit of flavor profiles and textures that only direct high heat gives us. After 2-3 min the sous vide steak is ready to flip and both steaks are ready to come off the kettle. Again, check with the instant read and pull when you like it.

10 Minutes Before Dinner - Finishing Touches
When the steaks are about 5° away from your target temp, pull them out and rest them on a cutting board (left to right in the photo we have skillet, sous vide and charcoal). They will raise those last few degrees on the cutting board. Resting also helps to keep every bite juicy. If you dig in now all your beautiful steak juice will leak out. While the steaks are resting, dice up your side veggies and cook them in a skillet of melted butter at medium high heat, stirring them frequently to avoid burning.
5 Minutes Before Dinner - Eggs
Eggs are easily one of the greatest foods of all time. I absolutely love how versatile they are. Mixed into baked dishes, hard/soft boiled, scrambled, over easy and my all time favorite - fried in olive oil with chive flowers. I found the recipe over on A Couple Cooks blog and will probably never eat an egg any other way, especially with steak! It’s stupid easy and stupid quick. Before we get to the eggs, slice a piece of bread as large as your toaster will accept and get it toasting. Grab some farm fresh eggs from a friend or farmers market (100% worth the effort to get good eggs) and some chive flowers (optional, but worth it if you have them). Heat up some olive oil at medium heat, throw in the chive flowers for 30 seconds or so, crack an egg over top of the flowers, and spoon the hot oil over the egg until its cooked to your liking. For me, the yolk definitely needs to stay runny. Don’t flip the egg! The oil will cook the whites perfectly and you will end up with a nice crispy ring around the edge. The entire process only takes a few minutes and I’m typically done with my eggs right about the same time my toaster pops.
By now our steak has had the time it has needed to rest. Super eager to see how they look, I slice into each one to see how they came out. A little surprised, but not really, they all look about the same! Again in the photo left to right we have skillet, sous vide and charcoal. For comparison sake I slice off a couple slices of each for my plate. If I were not doing the comparison the whole steak would go on my plate. If you were wondering earlier, I didn’t mention salt in my seasoning. I feel like it doesn’t do a whole lot early on, and I prefer some Maldon flaky smoked sea salt sprinkled over the steak and egg along with another dusting of fresh ground pepper.

Dinner Time
All thats left to do now is to dig in! If its early in the day, I’ll pair the meal with a cup of coffee. If its dinner, I’m grabbing an IPA (really I can’t think of anything that will not pair well with this meal). Honestly the venison being properly aged, cooked, and rested does not need any sort of barbecue sauce (especially if you have your runny yolk to dip into). The textures you get from the runny egg, the soft steak, al dente veggies, and crisp toasted bread are outstanding. I can’t explain how perfectly the flavors go with each other. You just have to do it.
Hindsight
So remember my friend Ryan’s advice about not letting the steak cook for more than 4 hours? Well my actual timeline (do as I say not as I do) had some delays and the steak was in the sous vide bath for 4 hours exact. Most everything came out great: moisture, meat temperature, flavor. The only thing that was off was the texture. It was soft. Really soft. Like borderline not needing teeth soft. A little disturbing; however, I took some of the leftovers, sliced them into little half inch pieces, seared them in a hot skillet, threw on a bagel with some cheese, and it was amazing. Just because you don’t like how something turns out the first go around doesn’t mean its trash! Try to salvage it, don’t put it straight in the garbage. Also I feel like my meat done-ness would have been a lot better if I was able to multitask or was only doing one method. The steaks came out a little more done than I typically prefer. Overall, my final thoughts on cooking methods via pro/con list on each process are as follows (all my opinion):
- Sous Vide
- PROS
- Nice even cook
- Helps tenderize a tougher cut of meat
- Beneficial if you want a larger window of ‘done’ time to work around (like 30-45 min vs 3-5 on the other methods)
- CONS
- Still requires one of the other 2 methods to finish the steak
- Extra tools involved (sous vide wand & a large pot)
- Requires a much longer cook time
- Charcoal Grill
- PROS
- Best flavor in my opinion
- Classic method of cooking I think we should all strive to master
- CONS
- You might smell like smoke afterwards (is this really a con though??)
- Challenging if in an apartment or bad weather
- Setup for only one or two steaks is sometimes a bit much (plan on adding some veggies or potatoes to the mix to cancel out this con)
- Pan Fry
- PROS
- Pretty much everyone has the tools for this method already
- Good to go in any weather
- Fastest from setup to eating
- CONS
- Spattering oil
- Not the most attractive looking finished steak (Hey, remember I’m a photographer)
My Overall Winner - Charcoal
I definitely feel like the pros outweigh the cons with this cooking method. It’s a super satisfying method with which to cook: building a fire, putting meat that I harvested on that fire, and then eating it. It’s a modern spin on what our ancestors have been doing for thousands of years, and I cannot wait to teach my son what I’ve learned about grilling.

Leave a comment
This site is protected by hCaptcha and the hCaptcha Privacy Policy and Terms of Service apply.